ClaimMaster makes it easy to quickly import patent figures from a file and turn them into templates for the automated patent application drafting. You can also import corresponding figure descriptions (including complex objects, such as formulas and annotations) as part of setting up figure templates.
To import multiple figures (as individual templates) into ClaimMaster, follow these steps:
- Open Patent Drafting Settings menu
From the ClaimMaster tab, click on the Patent Drafting Tools menu, then click on Patent Drafting Settings … :

Alternatively, you can bring up Patent Drafting Settings from the general Preferences, then Patent Drafting tab in ClaimMaster:

- Start Figures Import
Switch to Figure templates and then click on the Import Figures from a File button to import patent figure templates.

- Convert PDF figures to Word format (Optional for PDF files)
ClaimMaster can automatically renumber figures stored in Visio, PowerPoint, or Word formats. If you do not have access to a figure file in one of these formats but do have figures stored in a PDF (with a text layer), you can often convert that PDF to Word format with a fairly minor cleanup, especially if the figure graphics are not too complicated. To convert PDF figures into Word, first open the PDF file inside Word. Often, you’ll be able to modify individual portions of the imported figure directly or, alternatively, you may need to ungroup the imported graphics first by right-clicking on it and selecting the “Ungroup” option. Once you ungroup the figure, you’ll be able to edit individual components of each figure and remove anything that you don’t need to become a part of the template. After you make your edits to the figure graphics, save each imported figure in a separate Word file and you can use those individual files as figure templates with ClaimMaster.

- Select the File with Figures
Select the file containing one or more figures you wish to import into ClaimMaster (in Visio, Powerpoint, or Word format).

- Select Specific Figures to Import
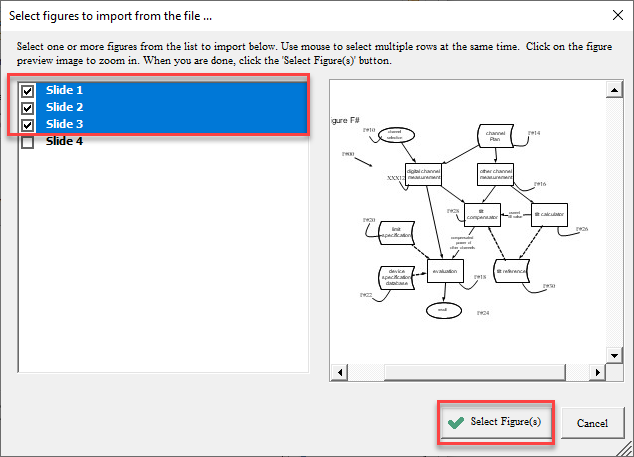
You’ll be presented with a preview window from which you can select specific figures within the figures file that will be turned into templates. Preview the individual pages/slides within the file and select one or more pages you wish to turn into figure templates, then click Select Figure(s).

- Select a New Figure Template to Edit
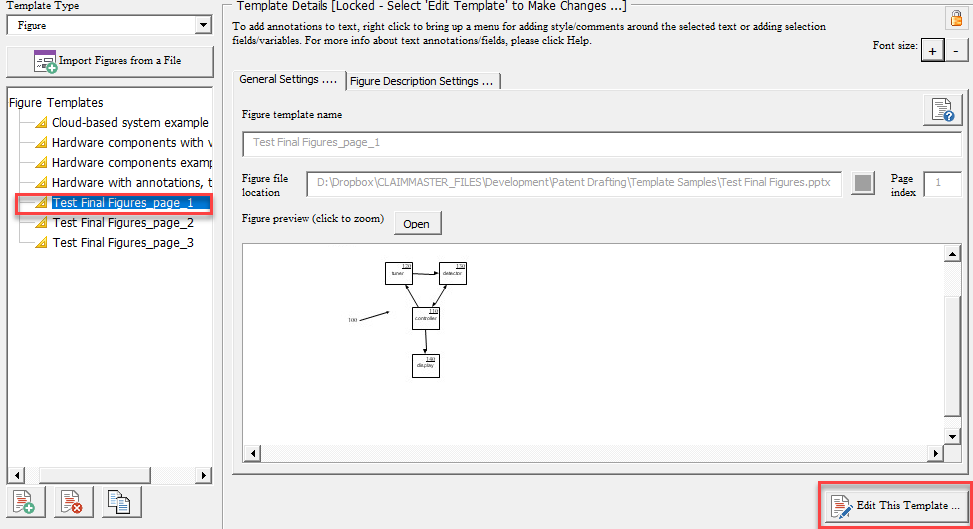
ClaimMaster will create a separate template for each of the figures you’ve specified in the previous step. You can now select each of these templates and click Edit This Template button to make specific changes to each new template.

- Add Figure Descriptions
When you are editing a particular patent figure template, switch to the Figure Description Settings tab and add default values for the figure # and part #s, as well as corresponding brief figure description. You can simply select the text in the open Word document and then right-click on the text windows and choose Insert select document text with annotations to have the text copied from the document into the field. If your short figure description references other figure (e.g., “Fig 3 is a flowchart of a process executed by Fig. 1“), we recommend that you replace the reference to the other figure with some placeholder name (e.g., Figure XXX or you add an annotations) to make sure that the reference to another figure doesn’t get automatically renumbered along with the main figure number.

You can also add full figure descriptions using the same approach. Remember that you can also add annotations, variables, and other fields to the figure description.

- Accept Edits to the Figure Template
Click on Accept Edits to have the template edits accepted.

- Required – Remember to Save Your Settings Edits
You can repeat steps 2-7 importing text descriptions for each of the new templates. After you’ve finished making edits to one or more templates, press the Save button to save your settings (required).

- Changing figure locations (Optional)
If you ever need to move the figure files to a different location or drive, you’ll need to update the paths for the figures in the template settings. To do this, you can either open each figure template in Patent Drafting settings and repoint the template to the new location for the figure (don’t forget to save after your edits).

Alternatively, to simultaneously change all locations for the figures, you can just open your patent drafting settings XML file in some text editor, such as Notepad++, and then bulk-replace old locations for all templates with the new locations, save the XML file, and then reload the templates. The figure files location and corresponding page # for each template are annotated with the <Location> and <PageNumber> tags respectively.

For more information on this feature, check out the Online Manual.