ClaimMaster features have grown steadily over the years and we’ve occasionally added features to address specific user requests. Some of these helpful ClaimMaster features might not be well-known to the casual users, so we’ll highlight them in this post to hopefully help you work a little more efficiently with our patent proofreading and patent drafting tools.
1. Adding ClaimMaster operations to the Quick Access Toolbar (QAT)
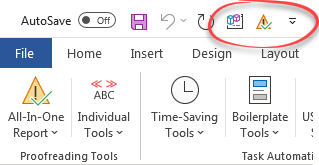
The Quick Access Toolbar (QAT) is a customizable toolbar in Word that displays the most frequently used commands at the top of the Word window, so that you do not need to navigate through multiple tabs or menus to launch a particular operation. QAT is particularly useful if you have a lot of different add-ins loaded in Word, making your ribbon look pretty busy and difficult to navigate. You can use QAT with any ClaimMaster operation to quickly launch it from the top of any open Word document, such as a command for an all-in-one proofreading report. To add any ClaimMaster command to QAT, right click on the command in the menu and select Add to Quick Access Toolbar. For more information about QAT, take a look at Microsoft documentation.

Once you add one of ClaimMaster’s operations to QAT, you’ll be able to launch it directly by clicking a small button at the top of the Word document.
2. Re-running All-In-One Report with saved options
ClaimMaster lets you generate custom all-in-one proofreading reports in the desired format (sidebar, HTML, PDF, Word), running only the specific checks on your documents. For example, you may choose to run only certain claim, part name, and antecedent checks. Once you save the desired reporting options in the Custom Report (see menu option below), you can keep re-running the same report with the saved options by just clicking on the top portion of the All-in-One Report button, as shown below.

You can also right-click on on the All-in-One Report button and add it to QAT, as we’ve explained above, so that you can quickly launch the same patent proofreading report directly from the top of any open Word document.
3. Reviewing previous reports and other generated documents
Once you’ve run a patent proofreading report, you can access it later from the “View recent reports…” menu in the All-in-One Report section, as shown below.
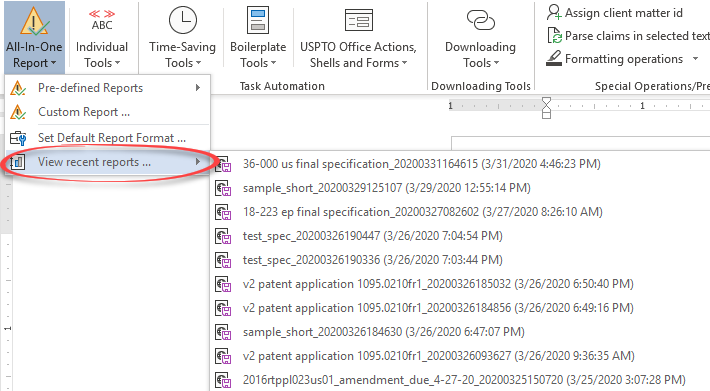
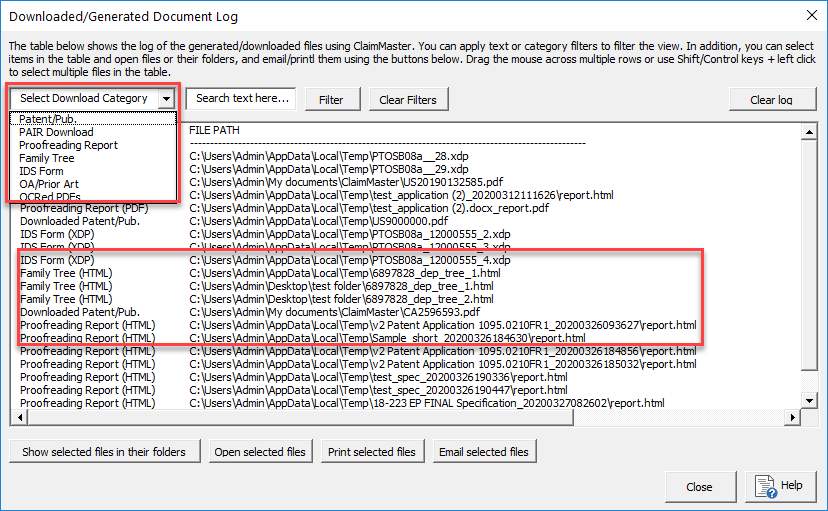
In general, ClaimMaster lets you quickly access recently generated reports and other downloaded files via the dedicated download manager. The manager keeps track of downloaded patents/publications, PAIR downloads, proofreading reports, generated family trees, IDS forms, OA/prior art, and OCRed PDFs. You can filter the list by category, date, names, file paths, or customer id. To start the document manager, go to Downloading Tools->Downloads/Generated Documents Manager, as shown below.
4. Adding inline claim comments
Some users prefer to place comments directly into the claims rather than using Word’s comments features. As such comments appear inline with claim text, they may cause false positives when ClaimMaster runs the check for lack of antecedent basis. To have ClaimMaster ignore inline comments in claim text, encompass the comments in double curly brackets “{{” and “}}” on both sides. For example, the highlighted text bellow will not be parsed for antecedent basis checking purposes:
1. A vehicular windshield washer fluid replenishing system for conditioning and treating rainwater comprising:
a collection funnel having an angular shaped upper wall and a lower wall {{Ann – do we actually need to recite the lower wall here?}}; and
an inlet connected to the collected funnel and positioned between a windshield and hood of a vehicle.
5. Using placeholder claim numbers
When drafting a new application, you may find yourself in a situation where you need to insert and renumber a group of claims in the middle of the existing claim set. You can do this using ClaimMaster with the so-called “placeholder” claim numbers. The placeholder claim numbering notation is claim #x#period (i.e., 1×1., 1×2., etc.). Once you insert all new claims, you can renumber the entire set using the sequential renumbering feature. For example, if you want to insert a new set of claims between claims 11 and 12, you can simply add claims 11×1, 11×2., 11×3 etc. after claim 11 and set all dependencies within that set using 11x# notation, as shown below (don’t forget to use periods after primary claim numbers and do not use periods when specifying parent claim dependencies).
11. A method of doing something, comprising doing A and B.
11×1. A system for doing something, the system comprising a widget connected to a gizmo.
11×2. The system of claim 11×1, wherein the gizmo is a flux capacitor.
11×3. The system of claim 11×1, wherein the widget is an oscillation overthruster.
12. A non-transitory computer-readable medium comprising instructions for doing A and B.
Once you perform sequential renumbering, all claim numbers will be set to regular integer values consistent with the overall numbering scheme for the claim set. For more information about the claim renumbering feature, take a look here.
6. Find citations for all claim terms in the document
Sometimes you may need to generate a stand-alone document that contains literal specification support for all of the claim terms. For example, this may be helpful when you are working with foreign associates that ask for such citation lists. To generate a full list of text citations for each claim term, go to ClaimMaster->Time-Saving Tools->Search Document For Text, then check the Find citations for ALL claim terms in the document option and click on the Find Citations button.
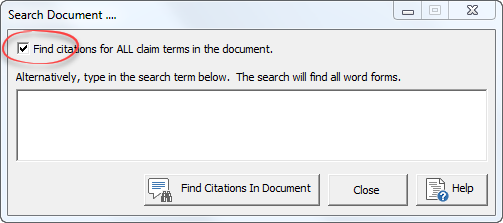
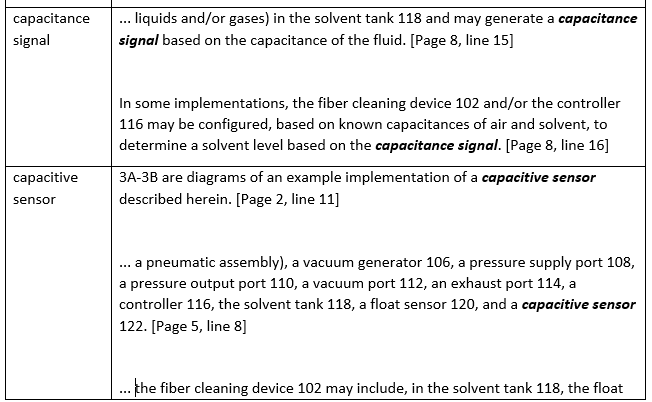
ClaimMaster will then parse the claims and prepare a stand-alone Word document with a table of citations, where the left column lists claim terms and the right column provides a list of all document citations for each term, as shown below.
For more information on this operation, click here.
7. Parsing claims and part #s in only the selected text region
Once in a while, you may need to analyze only a portion of the document when checking claims or part numbers. While ClaimMaster goes through the entire document by default, there is a way to force the tool to only operate on the select text region.
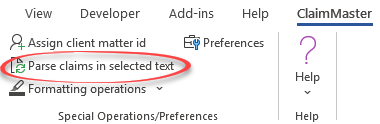
- Claims – you can force ClaimMaster to parse only the selected claim region by selecting the region in Word with a mouse and then pressing “Parse claims in selected text” button. Similarly, if the desired claim region is selected prior to running an All-in-One report, only that portion of the document/claim set will be analyzed for the report.
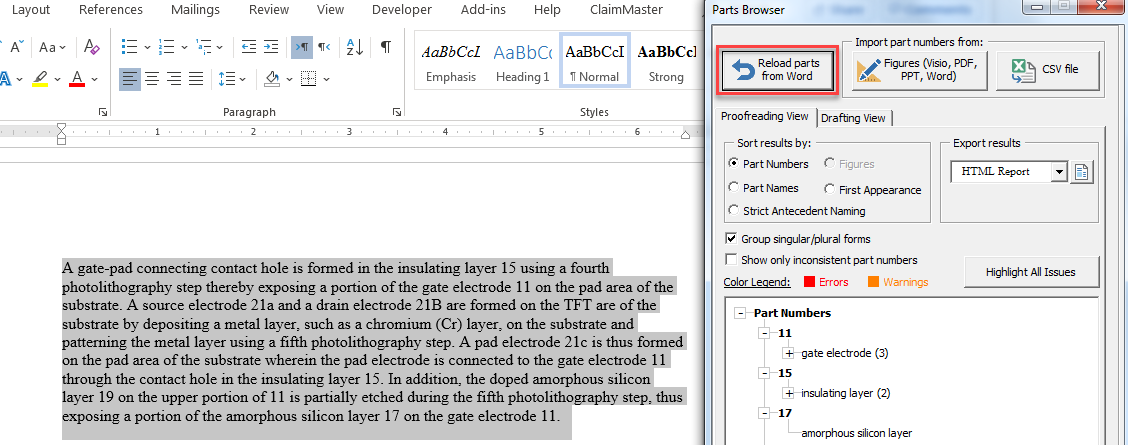
- Part numbers – when you first launch the Parts Browser using the “Check/Edit Parts Numbers” command, it will go through the entire document. However, on the subsequent runs, you can select the desired text region and reanalyze only the selected region by clicking on the Reload parts from Word button, as shown below.
8. Process large documents faster by minimizing Word
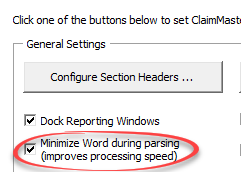
Over the years, Word object model has gotten slower and certain basic operations in Word 2019 now take much longer than they used to in Word 2003. You may notice some processing delays when using ClaimMaster to analyze larger documents with lots of claims (e.g., 100+ pages). When running into speed issues, you can allow ClaimMaster to minimize Word during processing operations, which often tends to speed up processing in certain environments. To enable this setting, go to ClaimMaster->Preferences and select the checkbox as shown below.
9. Manually editing generated patent proofreading reports
There may be times when you need to manually edit the proofreading report generated by ClaimMaster. For example, you might wish to change the report style, graphics, or perhaps remove certain sections or results before sharing the report with a client. The easiest way to customize ClaimMaster proofreading report is to generate it in Word format by going to ClaimMater->All-In-One Report and selection Word as the default format option, as shown below. After you generate the report and the Word document opens, you’ll be able to manually edit the contents of the report directly in Word.

10. Disabling auto-docking of reporting windows
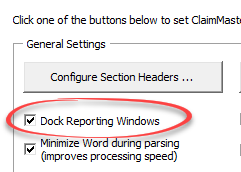
If you have a set up with many monitors (e.g., 3) or use a laptop with a docking station, you may occasionally notice that ClaimMaster reporting window doesn’t correctly attach to the right-hand side of the open Word document and disappears. The reason for this is that Windows may not be correctly reporting desktop sizes in those setups, leading to ClaimMaster window being positioned off the visible screen. To fix this issue, you can disable auto-docking of reporting windows in ClaimMaster by going to ClaimMaster->Preferences and disabling the Dock Reporting Windows checkbox. If auto-docking is disabled, ClaimMaster will open the reporting window right next to or on top of the currently open Word document.
We hope you find these features helpful. Next week, we’ll follow up with a discussion of more little-known features in our patent downloading tools.