ClaimMaster includes patent application drafting tools that let you to quickly generate the patent application Abstract for the patent application from a selected claim. The conversion process uses natural language processing (NLP) techniques, but is highly customizable based on user-defined templates for the Abstract generation.
Take a look at the demo of the Abstract generation tool below:
To convert one of the existing claims to the Abstract, perform the following steps:
- Open the Abstract Generation Tool
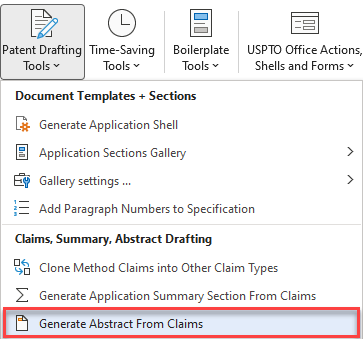
From the ClaimMaster tab, click on the Patent Drafting Tools menu, then click on Generate Abstract From Claims :

- Select One Independent Claim
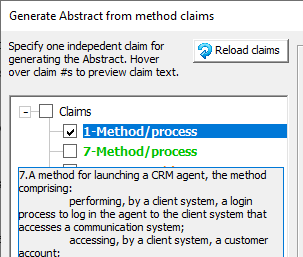
Select one independent claim to use as the base for the generated Abstract section. Method claims are preferred, but you can also specify other types. To help with the claim selection, if you hover over any claim number in the claim tree, you will be able to review the text of the claim in the small tooltip window that appears below the claim number.

- Select Template and Preview the Generated Abstract
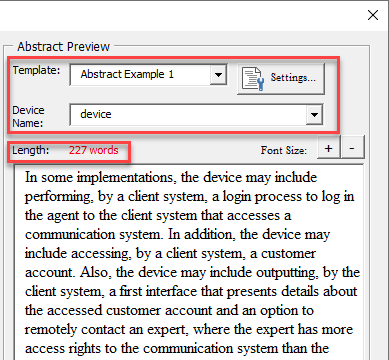
Select the desired Abstract generation template. For more information on how to configure Abstract generation templates, click here.
Once you select the claims, the template, and some of the additional parameters (e.g., device name to use in the Abstract), ClaimMaster will generate the patent application Abstract in the preview window. You can make edits to the generated Abstract directly into the preview window. When you insert the generated Abstract into the document, the text from the preview window will be used for insertion. Note that re-selecting claims or picking a different template will reset the preview window, so your edits will be lost.
In addition, you’ll be warned if the generated Abstract exceeds the 150 word limit set forth by the USPTO.
- Insert the Generated Abstract
Once you are satisfied with the preview/edits of the generated patent application Abstract, proceed to insert the generated text into the document. You’ll do this by clicking the Insert Abstract button. Prior to insertion, you can also specify whether to insert the generated text into the currently open document (at the current cursor location) or into a new document. Here you can also choose to insert the pre-configured Abstract section that includes a header (i.e., best used for documents that do not include section replacement fields).

After you insert the generated Abstract section, you can either close the Abstract generation tool or click on the Next Steps button to proceed inserting other sections into the shell using the built-in workflow.
For more information on this feature, check out the Online Manual.